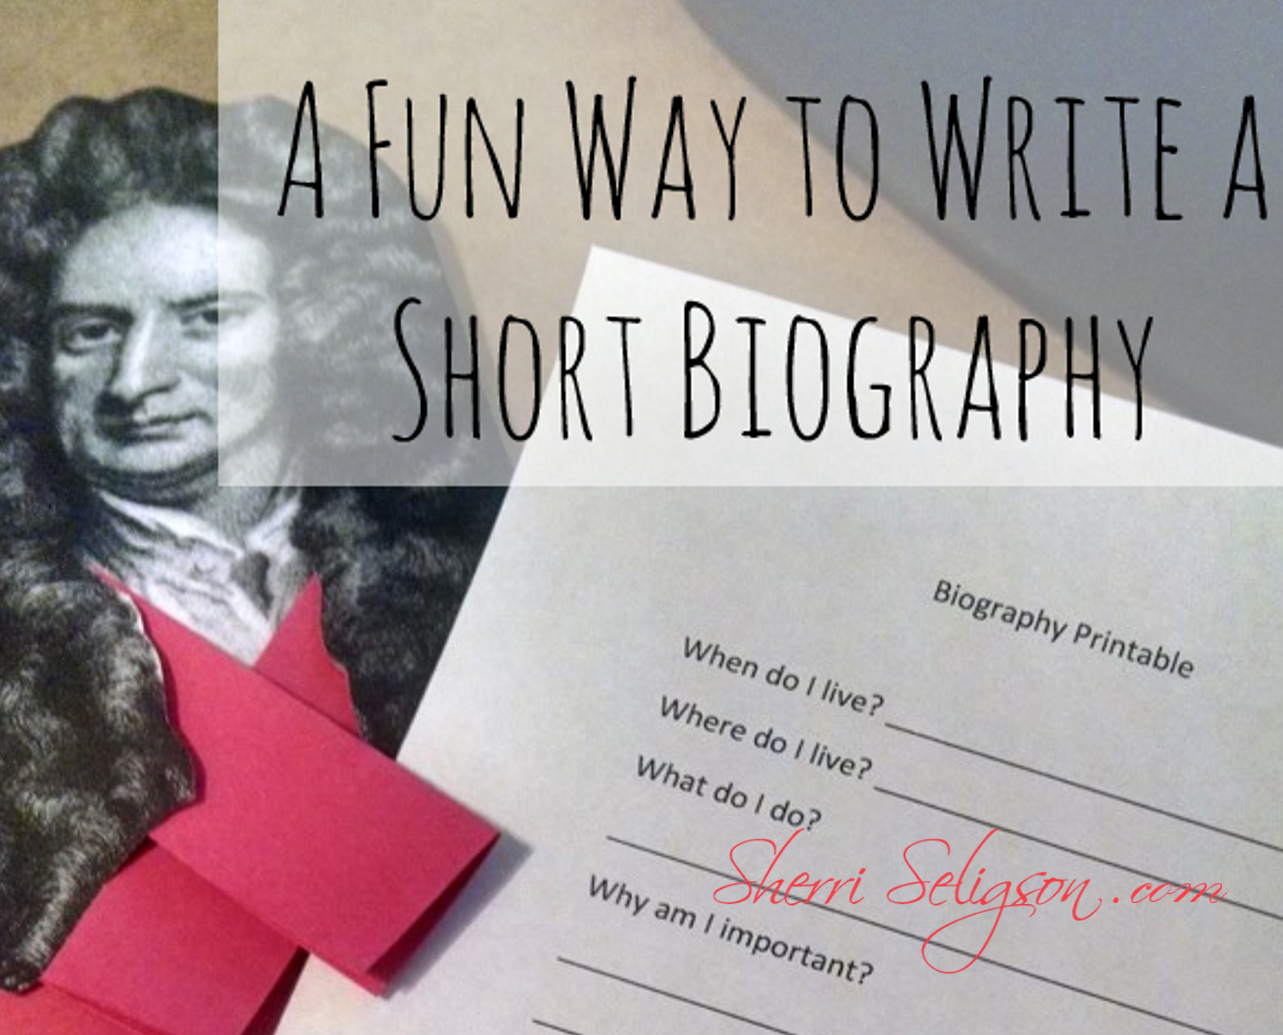
If you are like me, you have some students who really, really, really (really!) do not like to write. I always looked for ways to make writing at least a little bit more enjoyable, and this was one way that helped. Whenever we read about an individual, whether it was a missionary, a scientist, or even a lead character in a book, I tried to help my children summarize what they learned about this person. We did a biography “report,” but we did it in the form of a little craft.
Now don’t worry. This craft doesn’t require you to haul out the massive bins of craft supplies and sift through assorted sequins, pipe cleaners, and clay. This is an easy one. You just need a sheet of paper, colored or white, scissors, and a glue stick or tape.
You’re going to make a little “shirt” for your character, putting his or her head on it. Then all their information can be written inside.
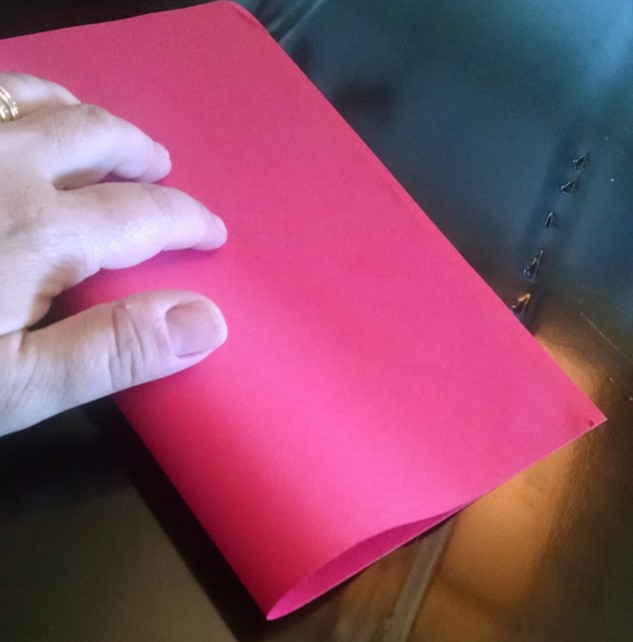
Step 1
First, fold the paper in half, like the Step 1 picture.
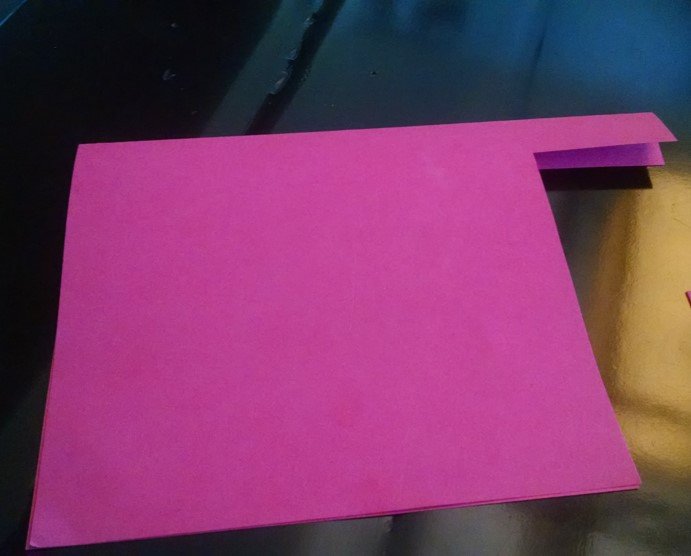
Step 2
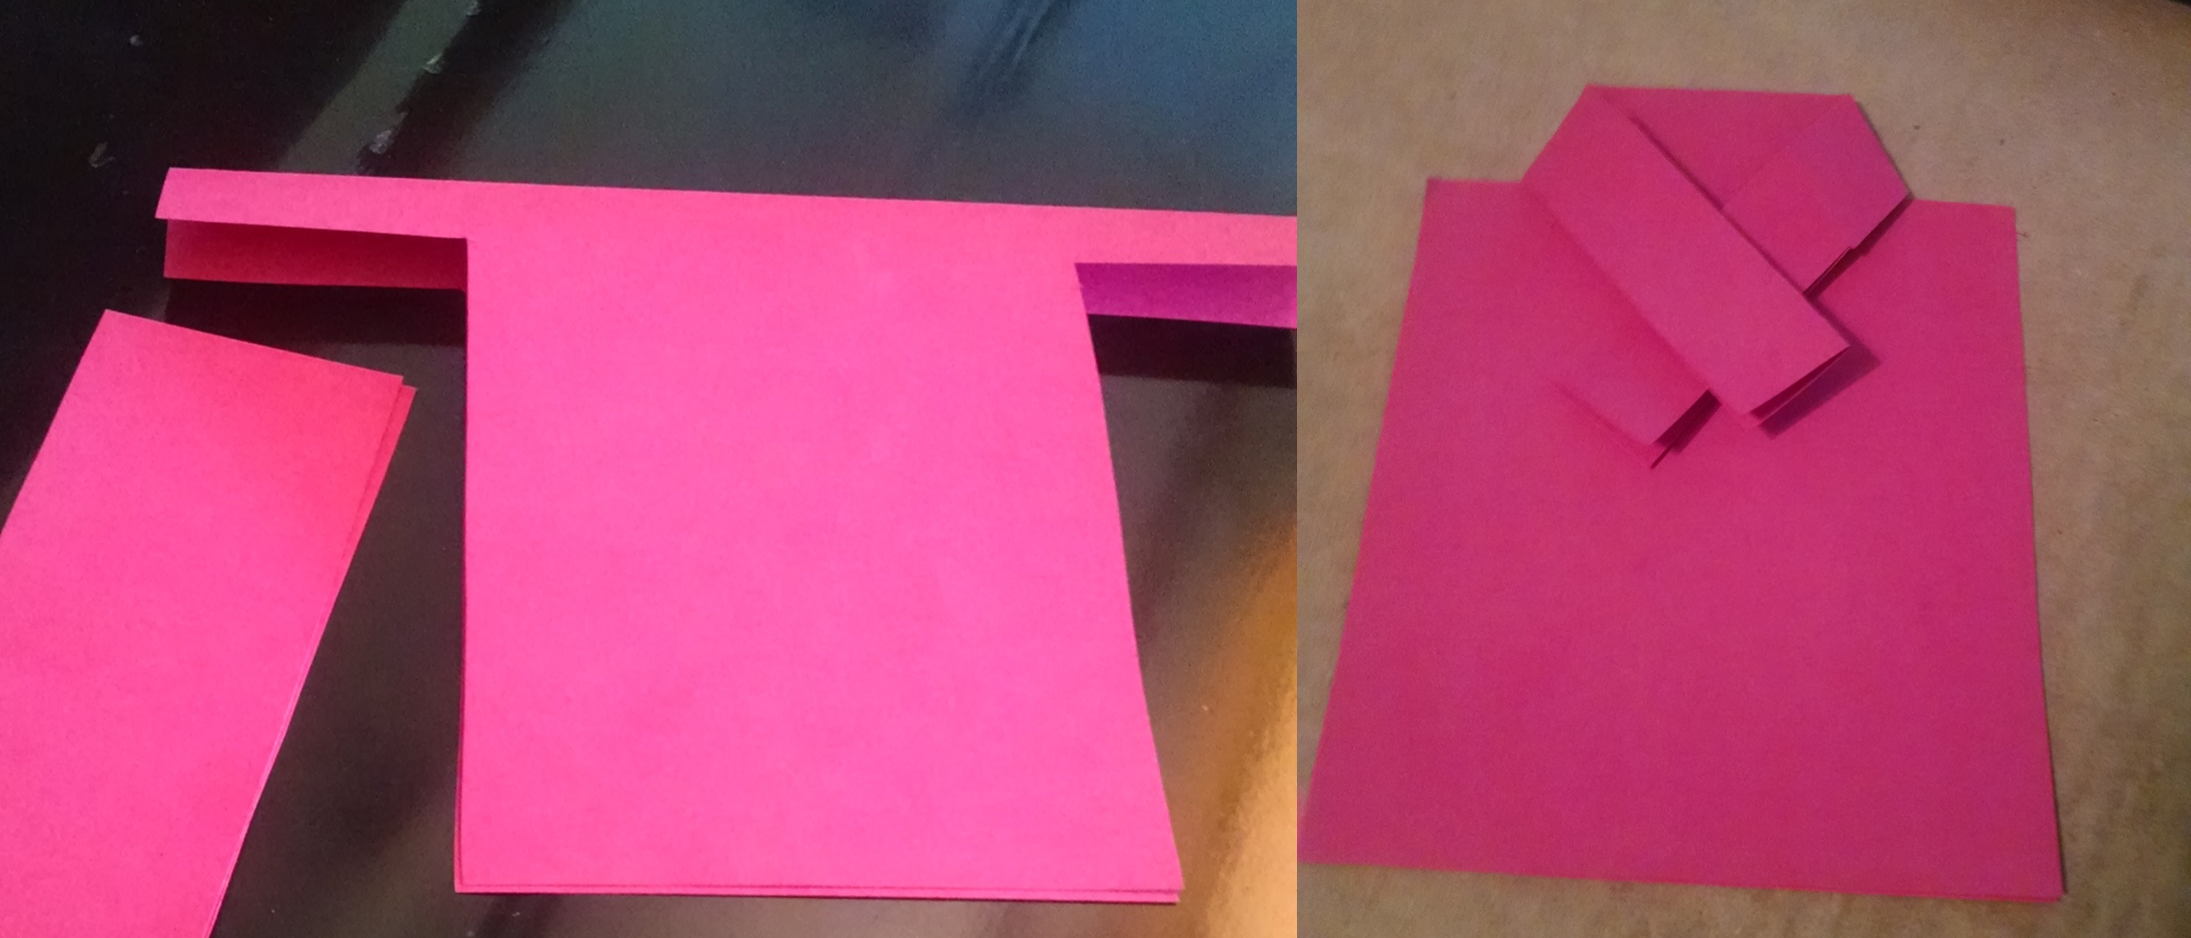
Then you need to make a cut for the collar. Begin the cut not quite an inch down from the folded side and cut in about 2 ¼ inches. Then cut down towards the open end of the paper (See Step 2 picture).
Steps 3 and 4
Now continue the horizontal cut another ¾ inch towards the middle. Do the same thing on the other side. You have created two flaps.
Fold each one in and down at an angle, letting them overlap each other. Now you have made a collar for your person (See Step 4).
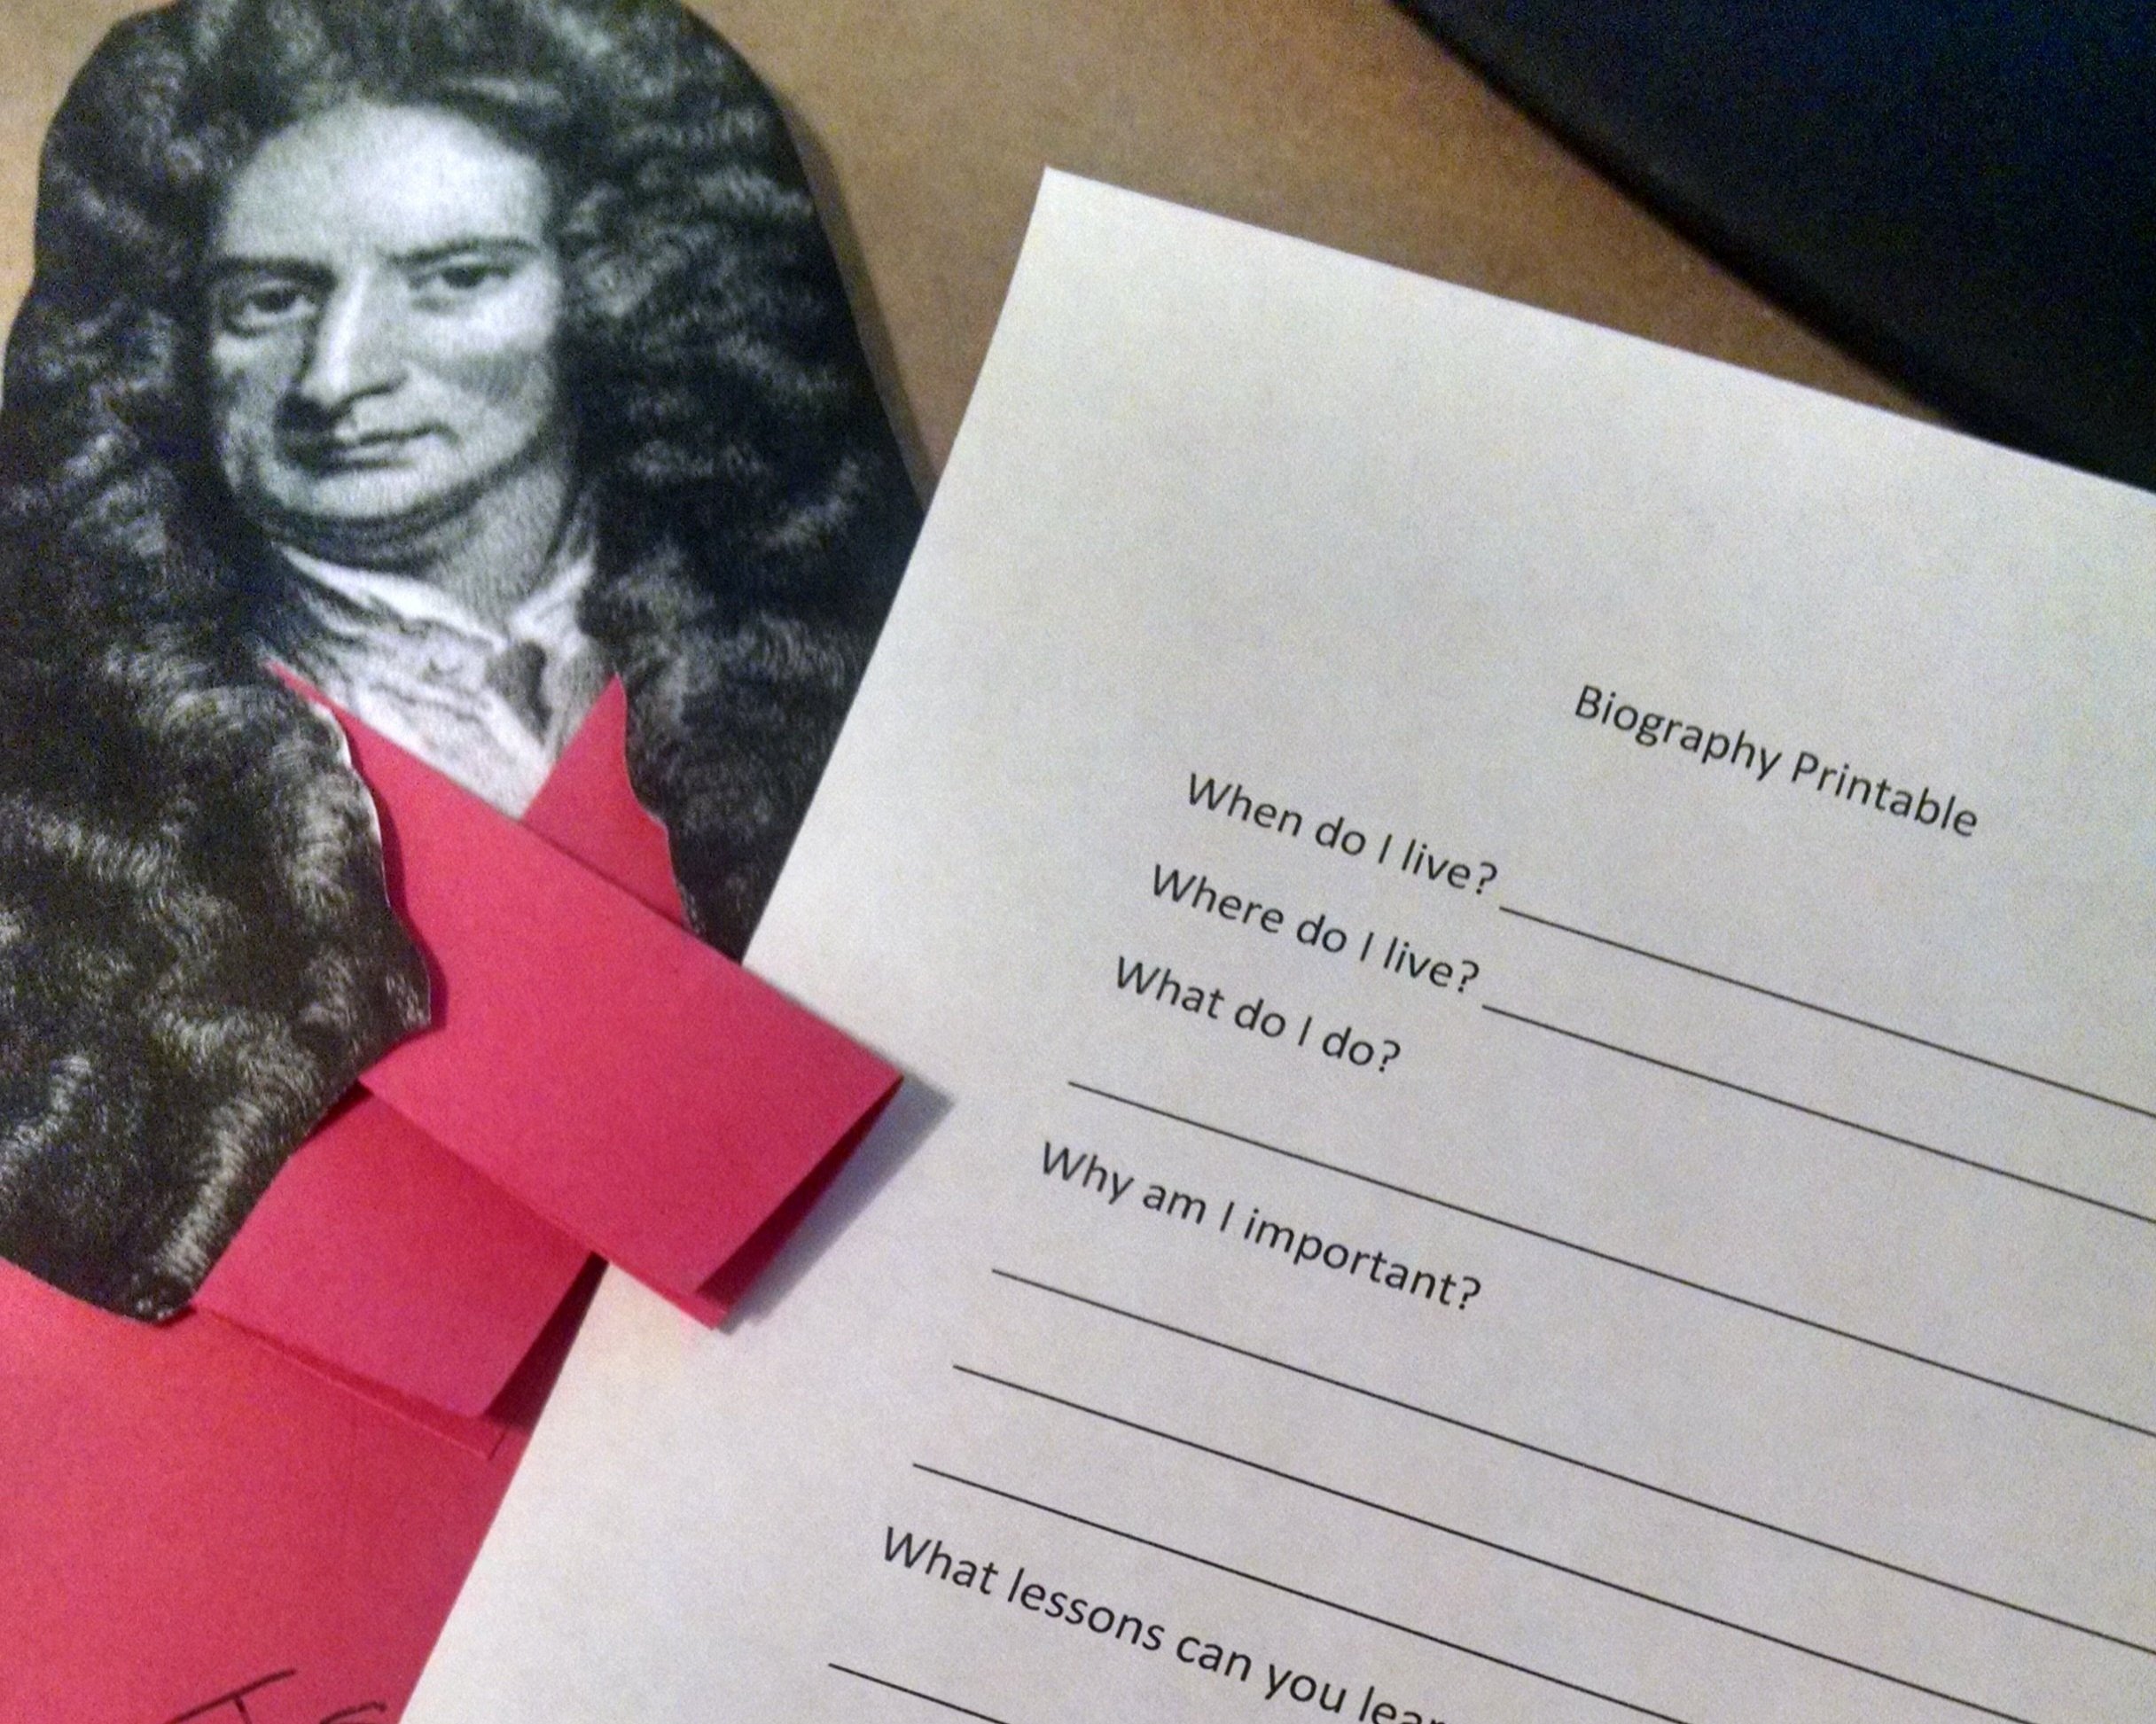
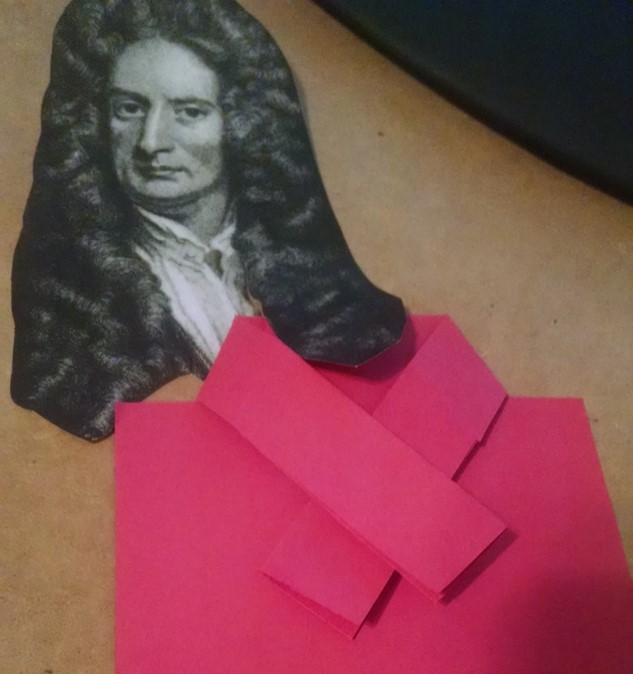
Photocopy or print out an image of your person’s head. I used Isaac Newton, and I included his amazingly scientific curly hair! Make sure your head is sized about 4 inches in height.
Cut out around the head and neck. You may have to cut off the shoulders, just do a bit at a time until the head fits into the collar (Step 5).
Step 5
Next, glue or tape the head and collar pieces.
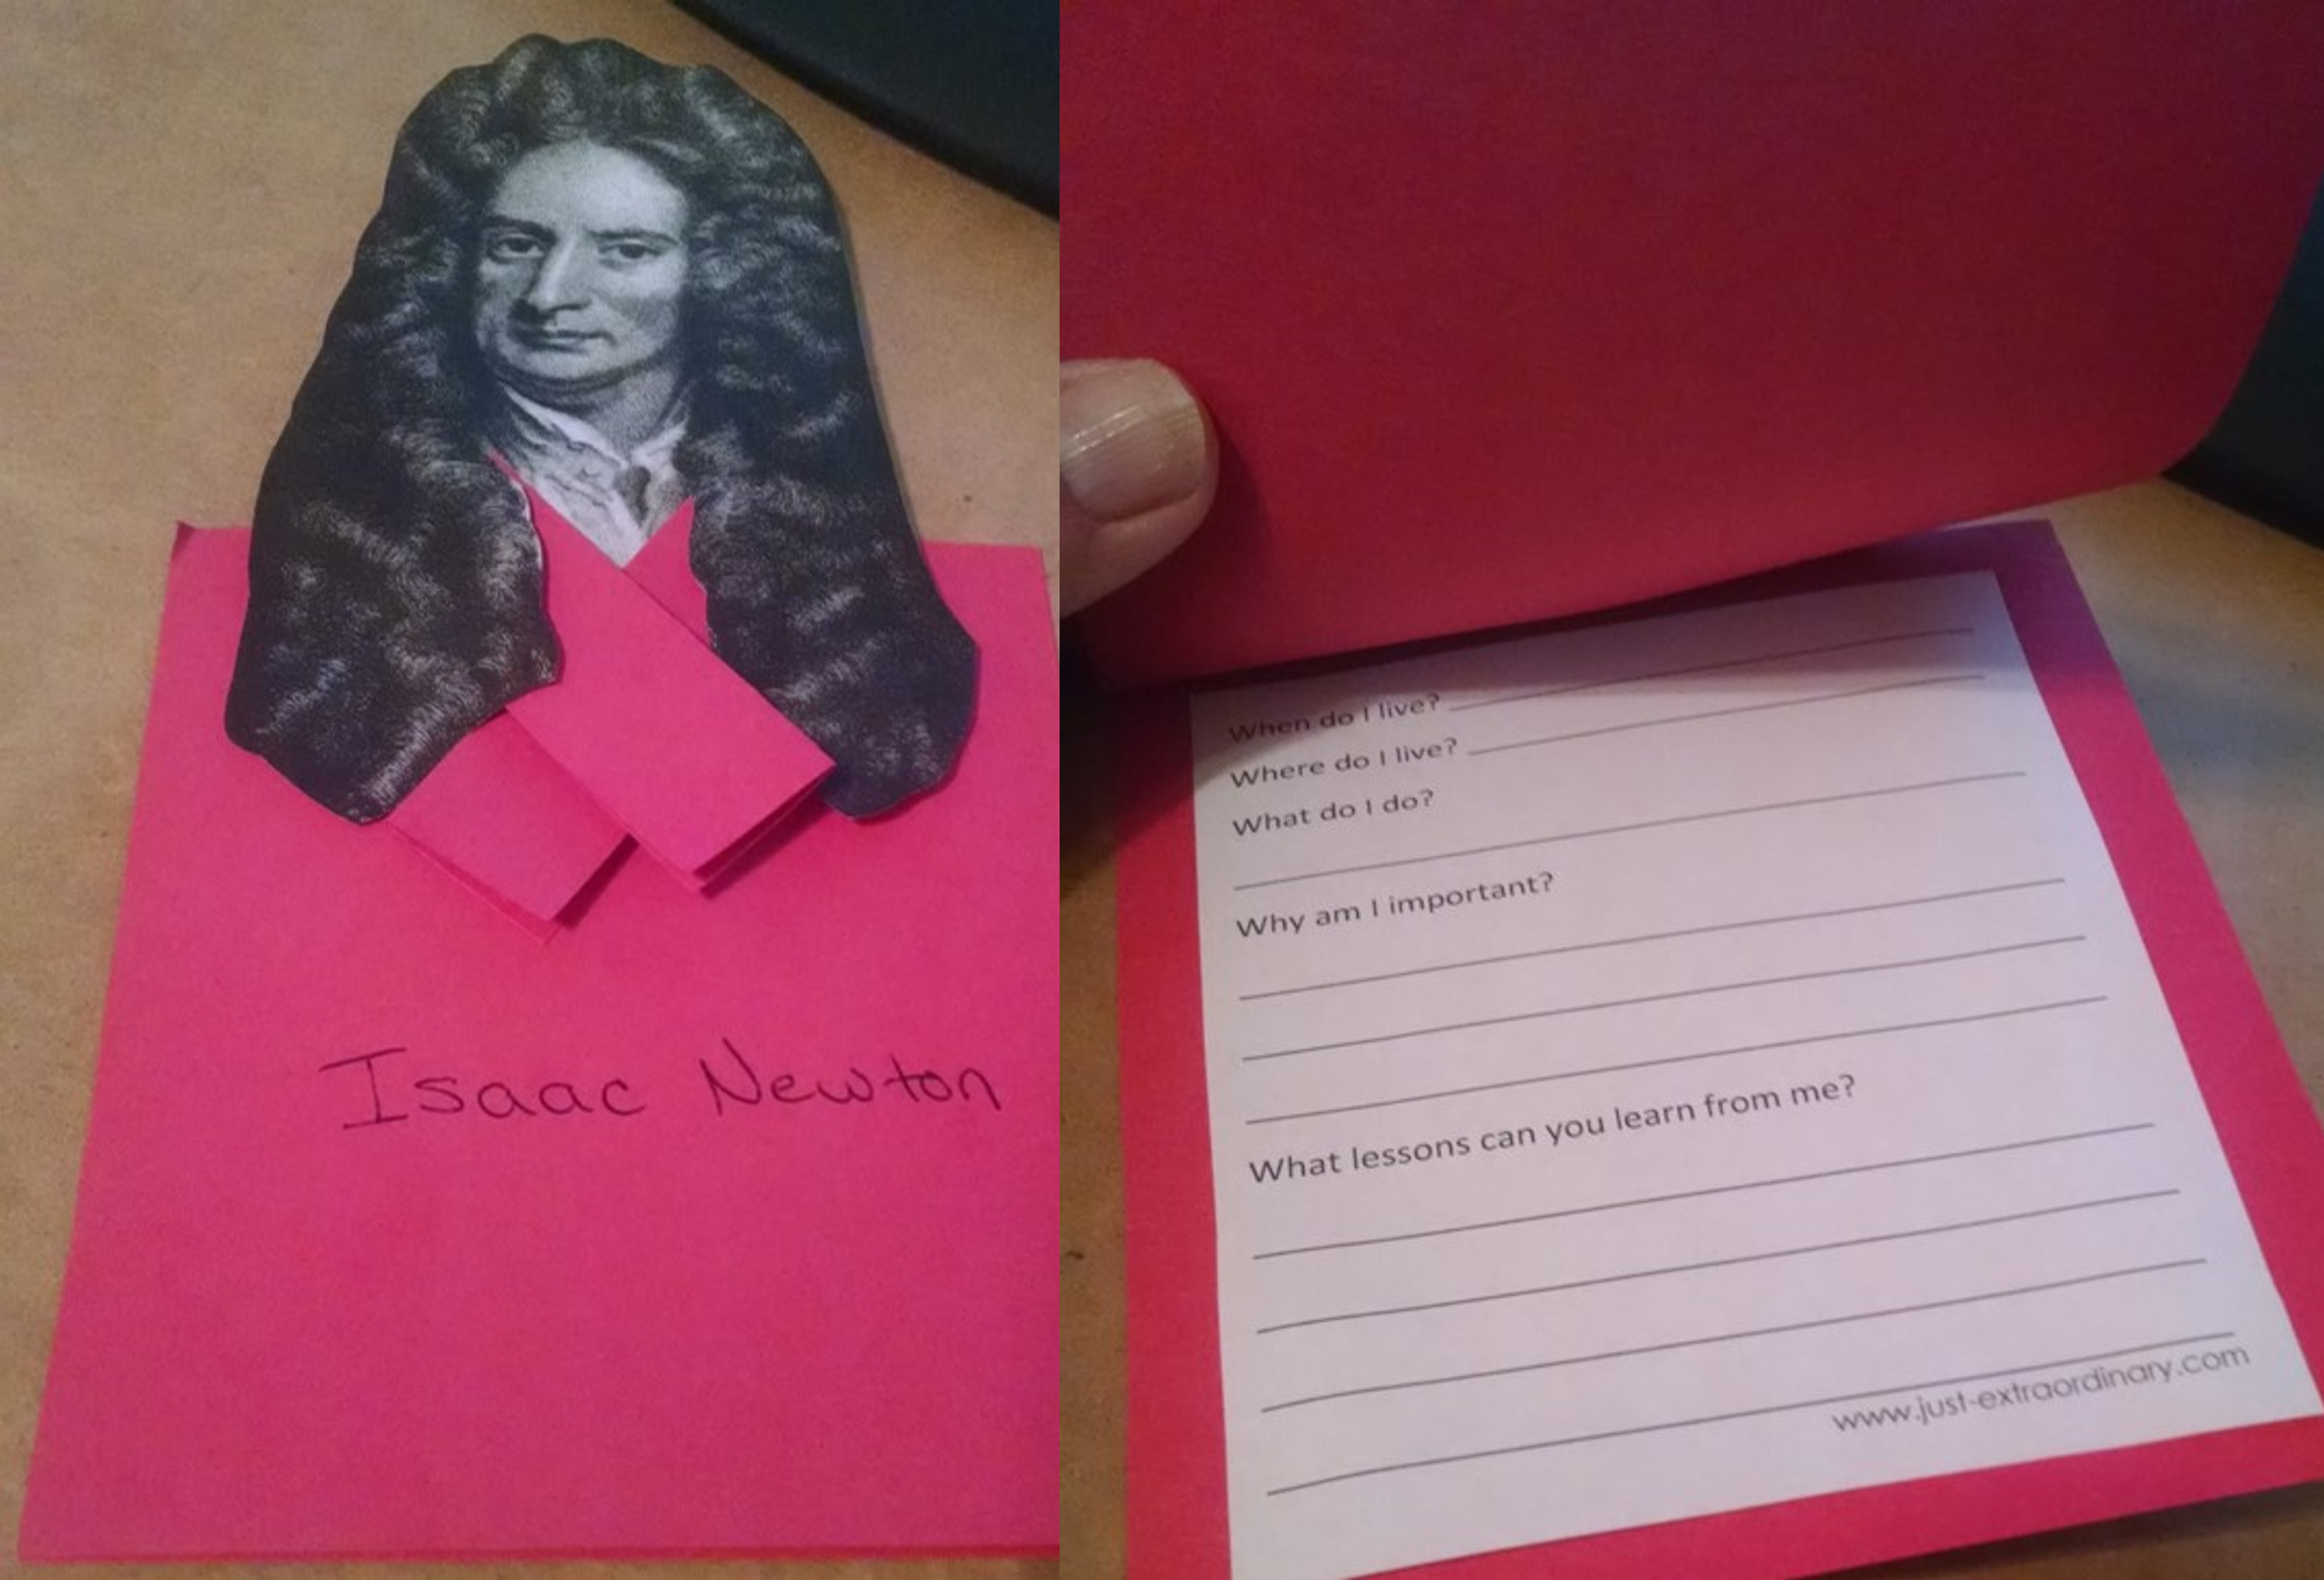
Have your child write the person’s name on the front. They can decorate the front with buttons, a placket, front pocket, apron, or anything that goes along with their person if they want, too (Step 6).
Steps 6 and 7
Now they can write key details on a separate sheet of paper, about 4 inches wide by 4 ½ inches in length. Then they can cut and paste that information inside the shirt they made (Step 7).
I included a template for you to download and use if you’d like.
When this is complete, your student has a little booklet they created, showing the major information about an important person.
It’s a creative and more enjoyable way to document what they are learning!